In Dynamics 365 Marketing, managing subscription lists is vital for successful implementation. This post will explain how to add contacts to a subscription list using Power Automate.
To learn more about Dynamics 365 Marketing subscription lists, check Microsoft documentation.
For more information, Removing contacts from a subscription list using Power Automate was explained in a previous post.
Subscription list
I will be posting in the future to explain what a subscription list is and how it differs from the new marketing segments and the legacy marketing lists.
In general, a client can have multiple subscriptions that allow the target audience to choose which list they want to join. For example, a company can have news, new products or product updates.
By joining any available lists, the target audience consents to receive communications related to this list.
Dynamics 365 Marketing allows the target audience to join or leave one or more subscription lists.
Add contacts to a subscription list using Power Automate.
As mentioned above, the communication recipient has total control over joining or leaving the subscription list. However, in some cases, we might need to add or remove contacts to one or more subscription lists. This can be needed during migration from a retired system or to fulfil an ongoing client need after the implementation.
This post will explain how to add contacts to a subscription list using Power Automate.
Power Automate Dataverse control
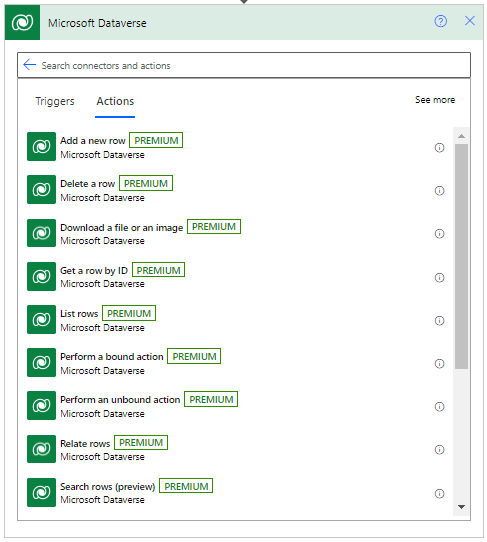
In Power Automate, add a Microsoft Dataverse control, as shown in the snapshot. From the list of Dataverse actions, select “Perform a bound action.”
Subscription list vs Marketing list
We added a Dataverse action, “Perform a bound action”, to the Power Automate flow. We need to know that subscription lists are traditional marketing lists with specific settings. Thus, we need to consider a subscription list as a marketing list record in the marketing list table when handling it in Power Automate.
Perform a bound action – Marketing list
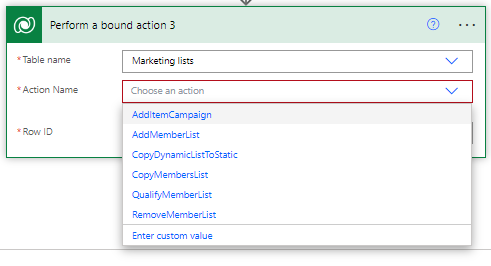
As explained above, a subscription list record belongs to a marketing list. Thus, we select “Marketing Lists” in the table name field.
We select the “AddMemberList” option from the drop list options in the action name field.
Related records
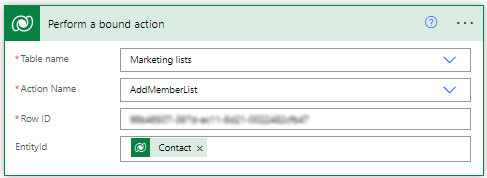
Finally, after selecting the “AddMemberList”, two fields become visible that we can set manually or dynamically.
The “Row ID” is the GUID of the marketing list to which we will add the contact. In my example, we had one specific list. Therefore, we set it manually.
The “Entity ID” is the GUID of the contact who will join the subscription list.


