With the help of a colleague of mine, Patryk Wojtal, Dynamics 365 solution architect at CRM Dynamics, wanted to call Dataverse’s values to be presented on an external portal without building a connection. He created a Power Automate to enquire Dataverse, read more  . Then, we modified the Power Automate to build an Application Programming Interface API that returns a JSON file that can be consumed by any external source. The API link can include variables to specify the returned values.
Why APIs?
Besides being secure, APIs are on-demand enquiries that don’t need to be scheduled. The external systems can request information whenever required, and the inquiries are specific to the exact records needed. I believe that one of the main reasons APIs are useful is the simplicity of JSON files, it is lightweight, well-formatted human-readable text. The JSON format is widely consumed by many solutions and easily can be adopted by any custom code and programming languages.
API and JSON generator using Power Automate
The Power Automat solution provides a URL, that can carry variables to pass data to Dynamics 365 or Dataverse.
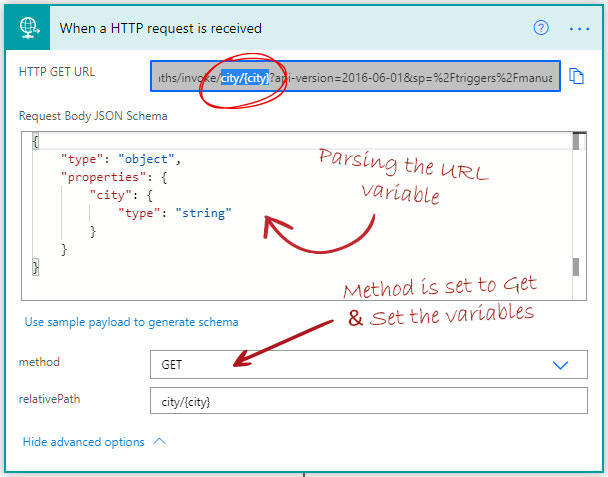
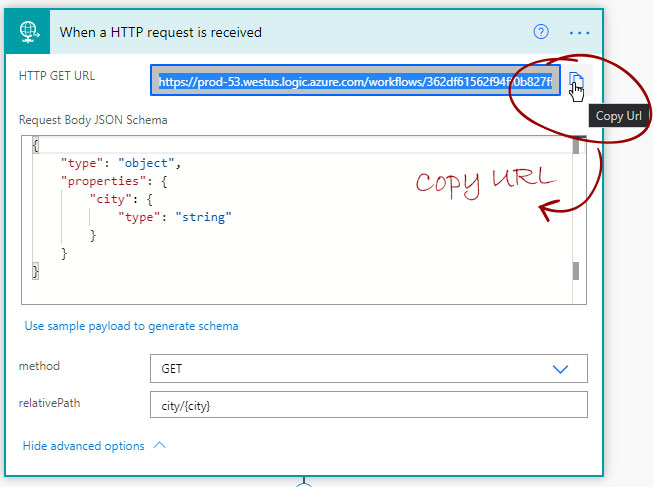
Step 1 – HTTP request 
The Power Automate trigger is “When a HTTP request is received.” For more information about the connector.
In our example, we will enquire from Dynamics 365 the accounts in one city; therefore, we created one variable called “city” with the method is set to “Get”.
If more variables are required, please follow the instructions below.
variable1/{variable1}/ variable2/{variable2}/ and once saved, the variables will be visiable in the HTTP
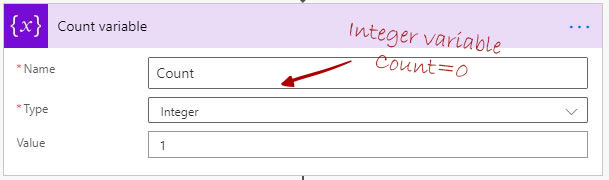
Step 2 – Initiate Variables 
First variable “Count” of the type Integer. the initial value is set to 1. This value will be added to the object name in the JSON file.
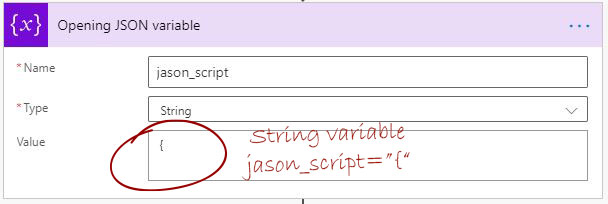
2nd variable “jason_script” of the type String, the initial value is the opening curly bracket “{” of the JSON file. I will be adding a line break after the curly bracket for a better format of the JSON.
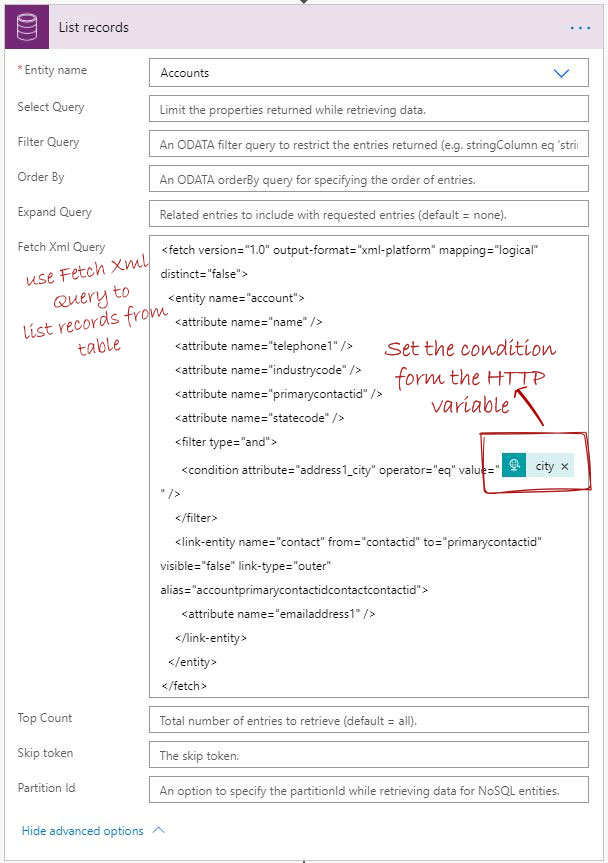
Step 3 – Dataverse List records 
Now, we need to get data from Dataverse or from Dynamics 365 and use Fetch XML Query to filer the data.
From the Fetch XML Query field and In the condition section, we use dynamic content to add the URL variable as the condition value.
In our example, we will be querying Dynamics 365 Accounts in a specific city.
Step 4 – Appending the JSON by Looping the table records 
– Apply for each Control
Firstly, an “Apply for each” connector is needed to loop in the enquired table records. each of the records is supposed to add one object to the JSON file. However, the JSON file has to be correctly formatted and all its objects have to be comma-separated.
– Condition Control
In our example, a “Condition” and an “Append to Variable” controls are added within the “Apply to each” control. To keep the JSON file correctly formated, the “Append” control will add a comma to jason_script variable between each object, and the “Condition” control will prevent adding a comma before the first object.
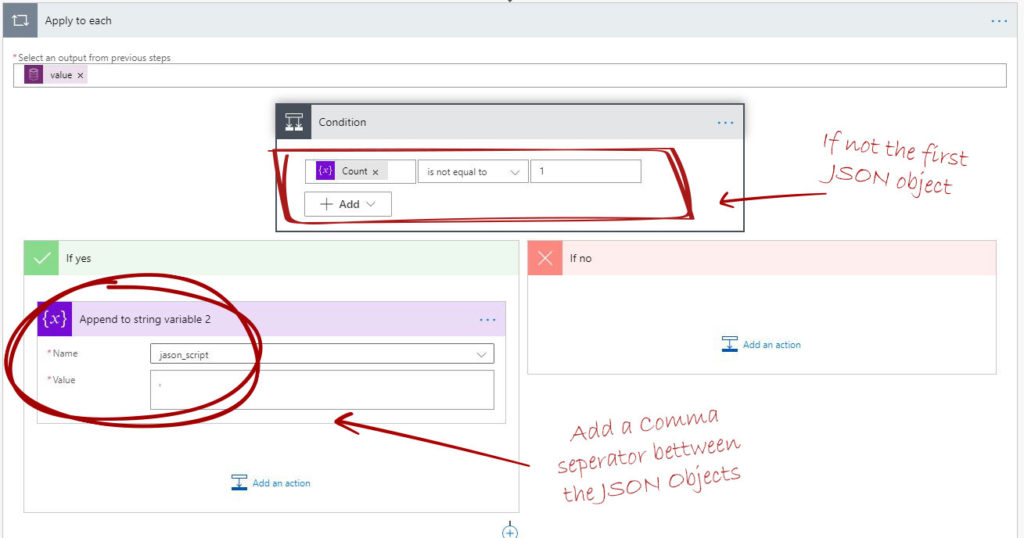
– Append Variable Control
The multi object JSON file is formated as below.
{
“ObjectName”:{
“Property1”: “String”,
“Property2”: Integer,
“Property3”: Boolean,
}
For our example, the object name will be “company_[count]” and will pass three Dynamics 365 Account string values “Company name”, “Phone” and “Email”.
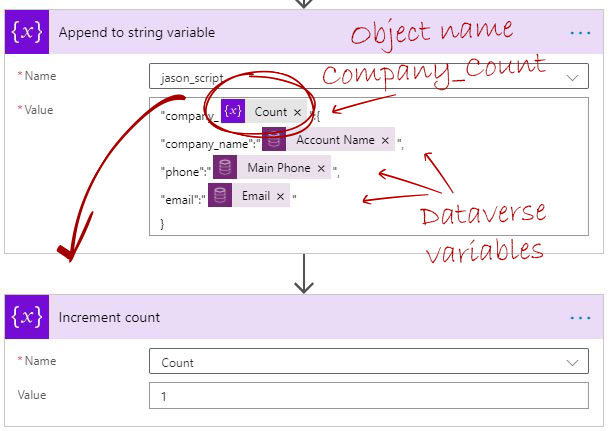
After appending each object, the count value is incremented by 1 to ensure that the object name “company_[count]” is always unique and that the comma-separator is not added for the first object when the count still equals 1.
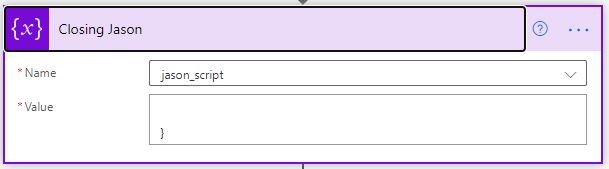
Step 5 – Closing JSON Script
Last appending step (Out of the Apply for Each loop) is appending the JSON script by adding the closing curly bracket “}”. I added a line breaker before the curly bracket for better readability.
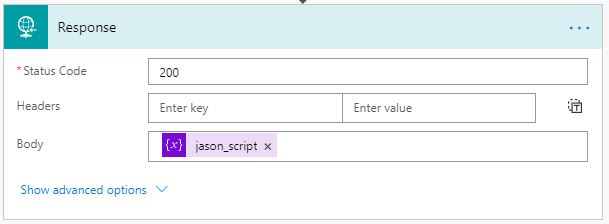
Step 6 – HTTP response
Finally, add HTTP respons connector and place the JSON script variable in the HTTP resonse body.
Testing and validating JSON Script
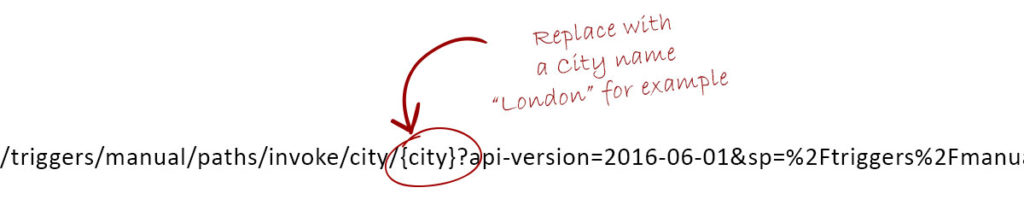
From the trigger of the flow, the “HTTP GET URL” is what the other applications should use as the API link. Also, the other application should replace the URL variable with a value.
To test, we have to copy the URL and place a value in the URL variable, “city” in our example.
Knowing that there are accounts in my test environment with the city set to London, I will replace the city with London in the URL to test, as shown below.
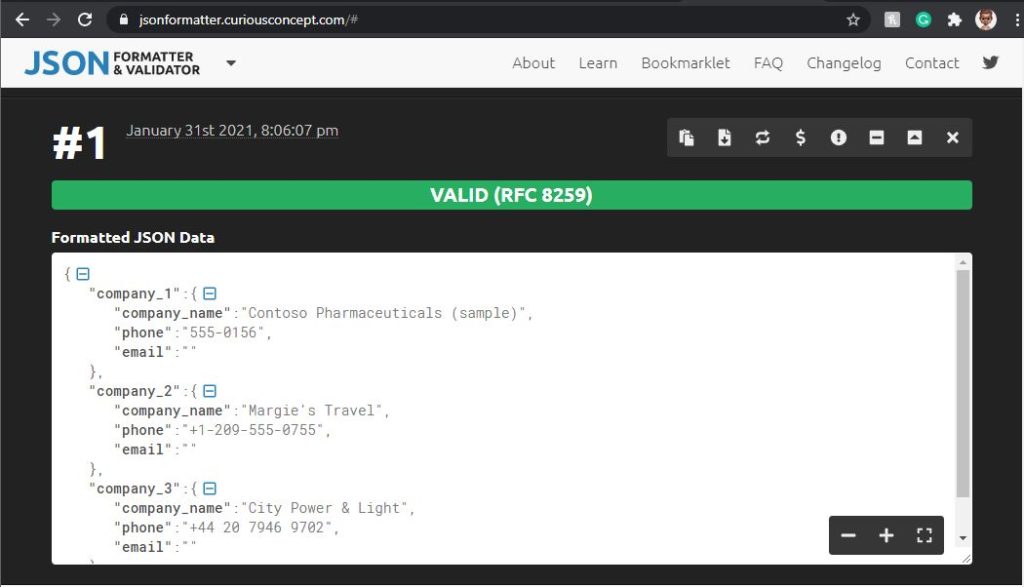
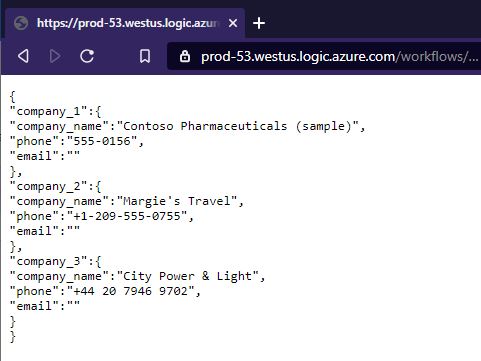
After enquiring the URL with city = London, a JSON file is returned with three objects.
To validate the JSON file is correctly created, I will use external JSON validator. A free JSON validator that I will use https://jsonformatter.curiousconcept.com/.
I will copy the entire JSON body and past it in the JSON validator.
The validator shows that the JSON file is correctley formated.