This post will discuss how to include a form processing AI Builder in Power Automate and how to use it after being trained, tested and published. For more information about creating Form processing AI Builder.
the first step, we need to log in to https://flow.microsoft.com/ and choose the right environment to create the canvas app.
Form processing AI Builder in Power Automate control
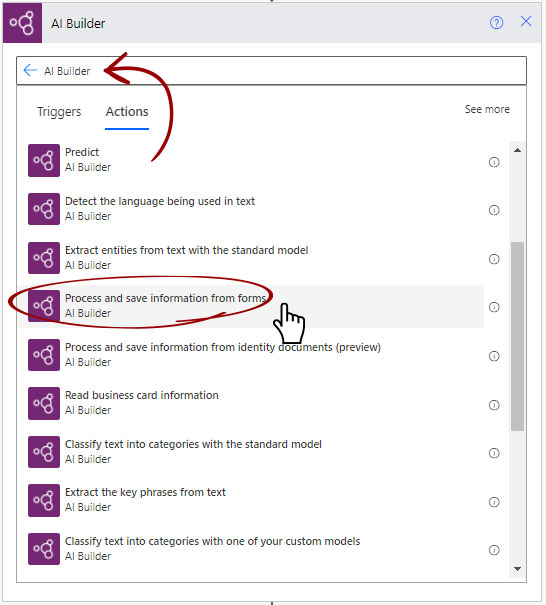
Click the “+ New step” to add a new action step to the flow, then search for “AI Builder” and select “Process and save information from forms” action control.
Action control in Power Automate
Once the Form processing AI Builder in Power Automate control is Selected, the form processing control will be added to the Power automated flow.
The Form processing AI Builder in Power Automate control is ready to use and doesn’t require a lot of development.
Select the published form processing
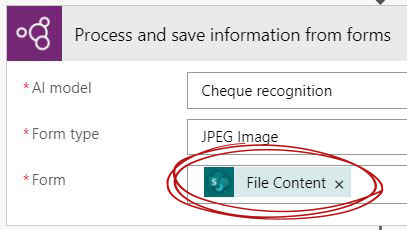
At this stage, we must choose one of the published custom models to be added to the flow or create a new custom form processing model.
Read more about creating a Form processing AI Builder. This step is required before adding any form processing models.

Seting the form format type
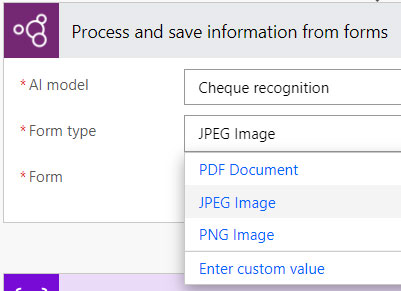
The action control requires knowing the format of the form which will be processed. If we choose one value then pass other file format types, the process will fail. Therefore, knowing the file format is essential for completing the process. Formats are as follows.
- PDF Document
- JPEG Image
- PNG Image
- Or, custom value
The form that will be analyzed.
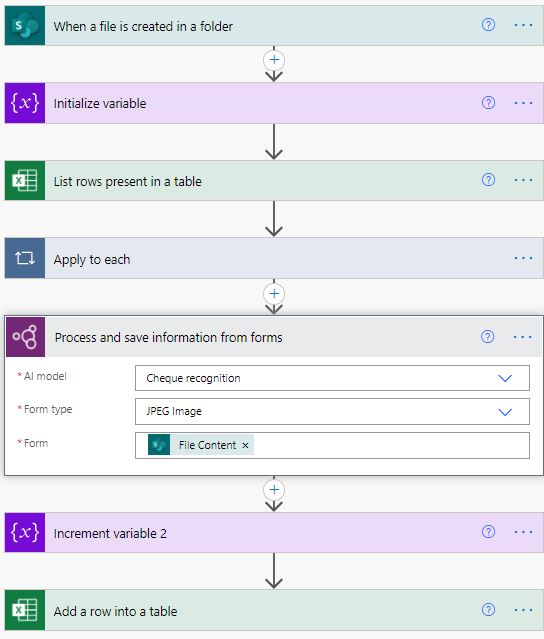
This is the actual binary image file that will be analyzed. As mentioned in the previous step, the file is either PDF, JPEG or PNG. However, this file should be added from a source. In my example, I added a SharePoint Trigger to the Power Automate flow to listen to any newly added files in a specific site folder. Then the flow will process these files using the Form processing AI Builder in Power Automate connector.
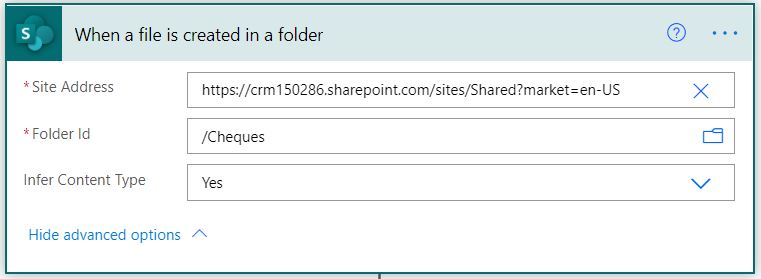
Then, in the Form processing AI Builder in Power Automate Connector we will add the SharePoint file content in the form field to be processed.
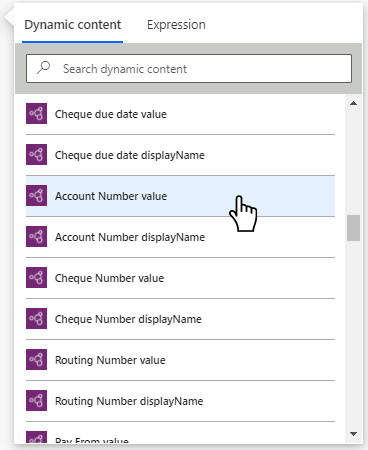
Using the Dynamic content, we will add SharePoint File Content value.
Processing the AI Builder model results
In later steps, after the model gets processed, we can use the outputs of the Form processing AI Builder in the Power Automate connector.
In my example, I will create a new table row of data in Excel online and populate the excel cells with the AI Builder model fields.
Alternatively, based on the business requirements, in this stage, we can populate the data in any other data source.
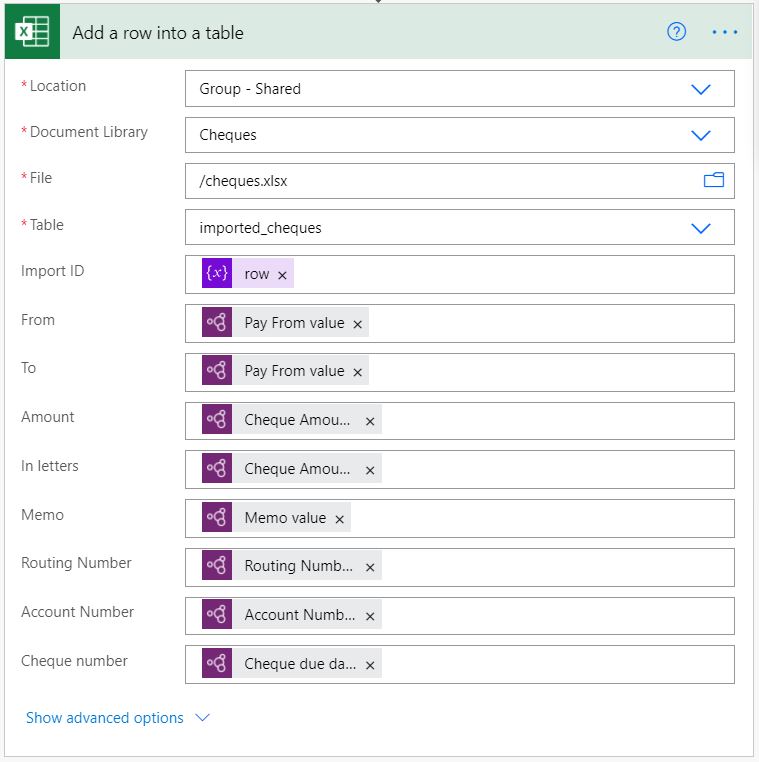
Populate the AI Builder model results
We can easily populate the data in the destination data source using the “Dynamic content”.
The data that is available to be included are as follows.
- Each field extracted value – String data type
- Each field confidence score – a float data type. The score is a value between 0 to 1. The higher the confidence score is, the more accurate the data extract is.
- The data extracted and the confidence are also possibly extracted in a table.
For more information about the inputs and outputs of the form processing AI Builder in Power Automate control.