


Microsoft and Adobe have formed a partnership to integrate Adobe Sign within Microsoft products, such as Microsoft Office 365, Teams and Microsoft Dynamics 365. This post will discuss installing Adobe Sign for Microsoft Dynamics 365 trial.
Read about the 2018 press release formed partnership between Microsoft and Adobe to integrate Adobe Sign with Microsoft business solutions.
In previous posts, we discussed how to use Adobe Sign for Microsoft Dynamics 365 and spotted the light on the Incomm Payments business case study.
Install Adobe Sign for Microsoft Dynamics 365 trial
To install Adobe Sign for Microsoft Dynamics 365 trial, We require to get Adobe Sign solution for Microsoft Dynamics 365, which is available to install for Microsoft Dynamics 365 Sales, Customer Service and Field Service. To get and install Adobe Sign for Microsoft Dynamics 365 trial or production from Microsoft AppSource.
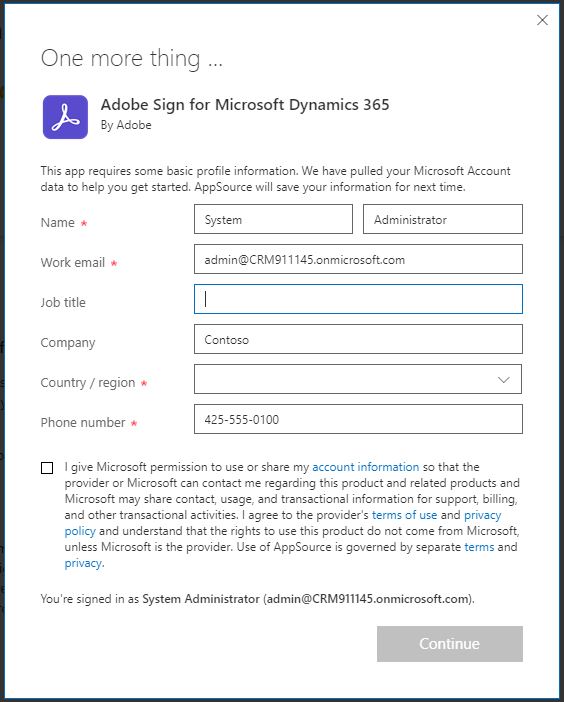
Share account information with the solution vendor
To install the Adobe Sign solution from the App Source, we are required to give permission to Microsoft to share our contact information with the solution vendor, in this case, Adobe.
Once the required data is completed, and permission is given, we will be able to proceed with the installation process to the Power Platform admin center.
Install Adobe Sign for Microsoft Dynamics 365
Once the permission is given, the page will be redirected from the App Source to the Power Platform admin center, and using the same account, we will be needed to choose the environment where we will install the Adobe Sign solution for Microsoft Dynamics.
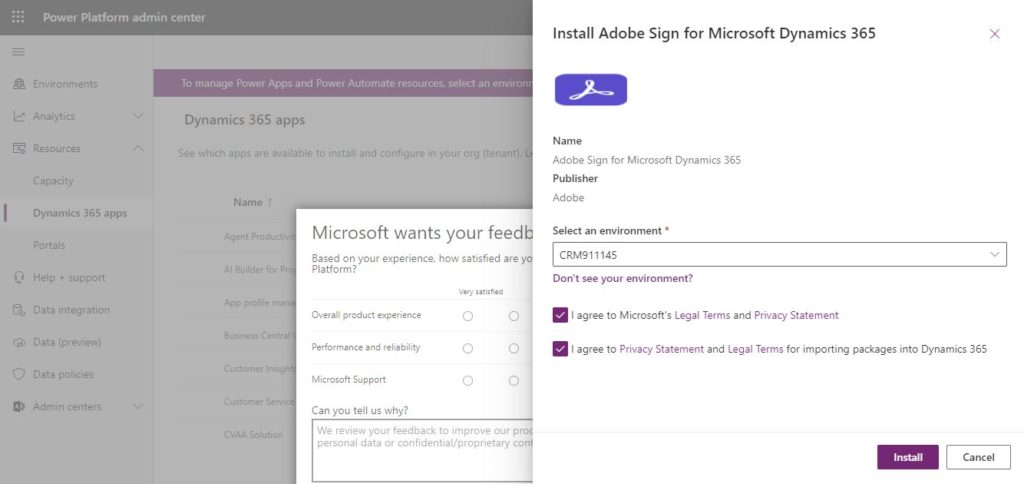
After agreeing to the legal terms and the privacy statement, we will be able to progress with installation.
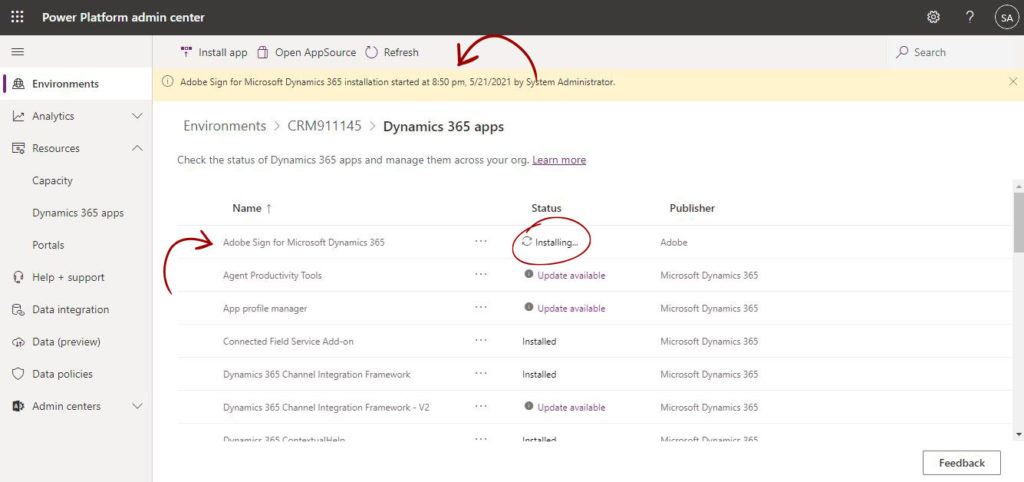
Solution installation
The installation will start and be viewed from the Power Platform admin center. The installation will take time to install, and once installation completes, the Adobe Sign configuration can continue.
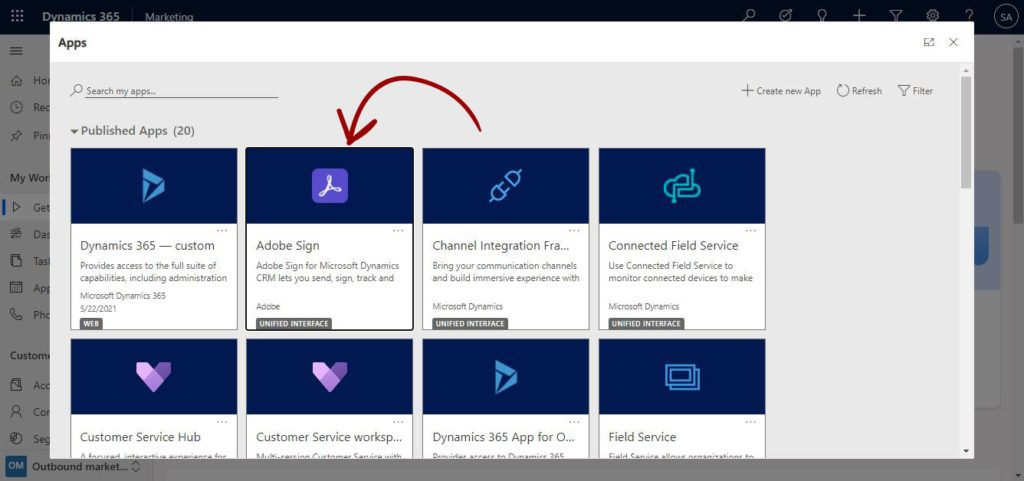
Adobe Sign App for Dynamics 365
After installation is completed, and from the apps area in Dynamics 365, a new Adobe Sign app will be available to be used and to configure Adobe Sign.
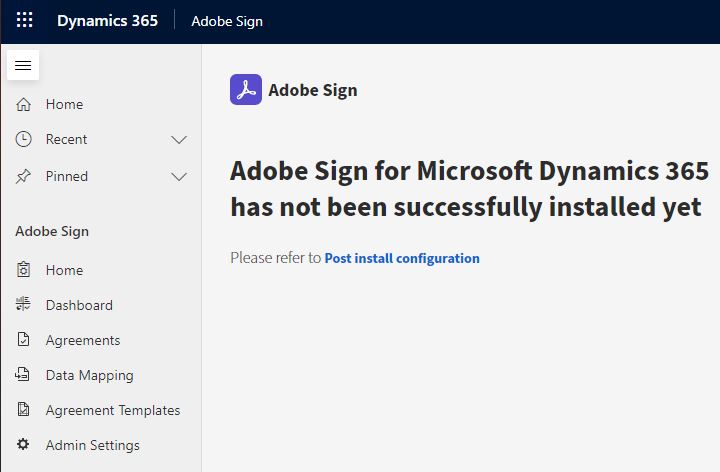
Post install configuration
From the Adobe Sign App home page, We can see that the installation is not completed, and we are still required to complete the process with a link to the Post-install configuration.
The link is a link from Adobe on how to install and configure Adobe Sign for Microsoft Dynamics 365
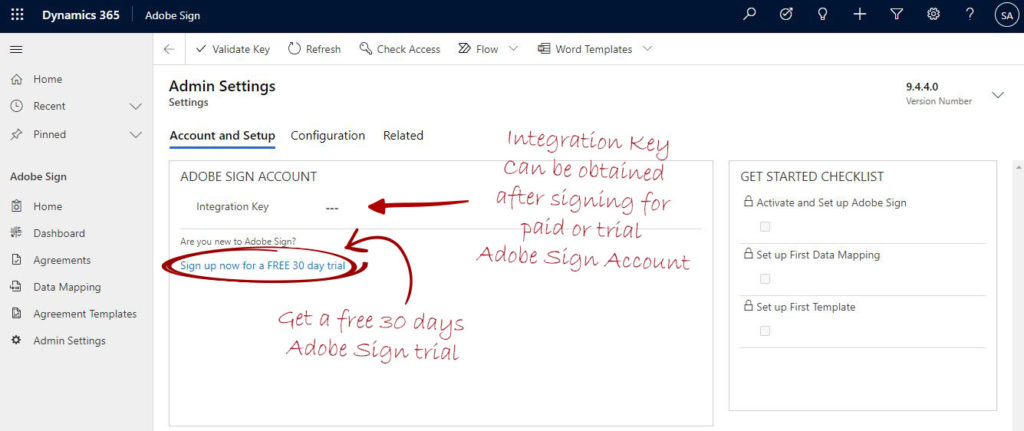
Adobe Sign account integration key
It is important to understand that we require an Adobe Sign paid or trial account to complete the Post-install configuration. Obtaining a paid account can be done by the client’s IT department; for Adobe Sign plans and pricing, check the following link https://acrobat.adobe.com/ca/en/sign/pricing/plans.html.
However, for this post scope, to obtain Adobe Sign trial directly from the Dynamics 365 app, from the “Admin Settings” page, we are supposed to include the Adobe Sign integration key. If we have a paid Adobe Sign account, we can claim a free 30 days trial from the link https://esign.adobe.com/adobe-sign-microsoft-dynamics-trial-registration.html?ref=msappsource.
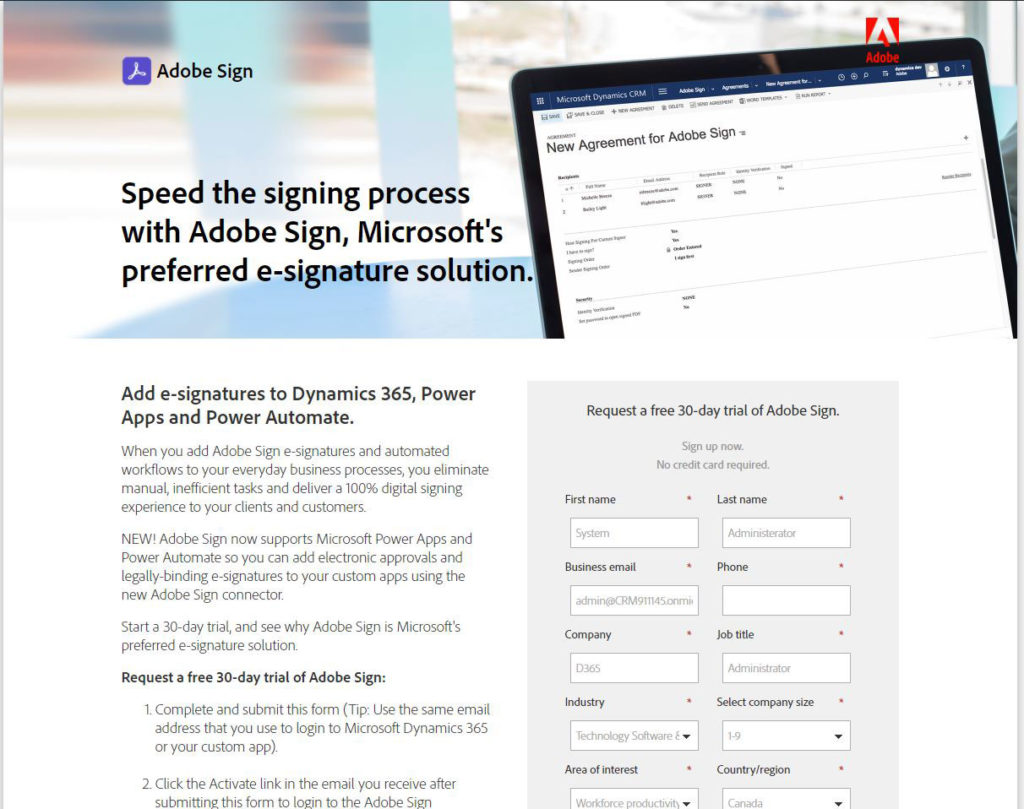
Sign up for a free 30 days
To be able to test Adobe Sign with Dynamics 365, we will have to sign up for an Adobe Sign trial account. Using the 30 day free trial, we will get an instant trial account.
Setting the Adobe Sign Account
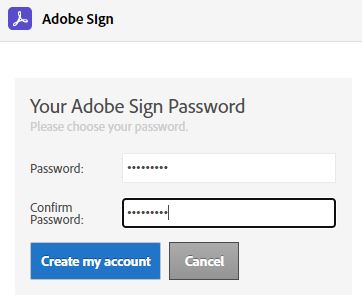
After completing the trial request, we will receive a validation email that will direct us to choose an account password.

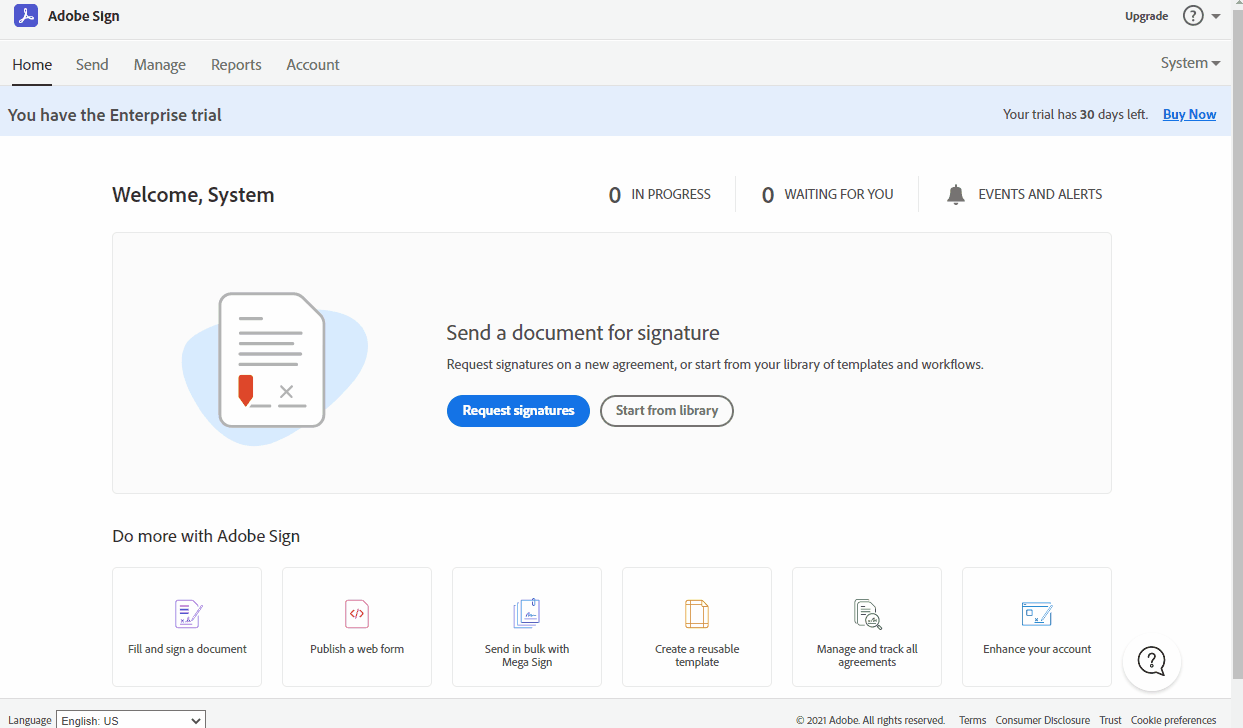
Adobe Sign trial account
From the newly generated account, we can view how many days are left in the Adobe Sign account, convert the account into paid account and manage the account by setting additional users.

Now and after having an Adobe Sign trial account we will go back to Post-install configuration in the Microsoft Dynamics 365 installation guide.
Post Install Configuration
As instructed in the Microsoft Dynamics 365 installation guide, we can get the “Integration key” from the Adobe Sign API from the Adobe Sign account page.
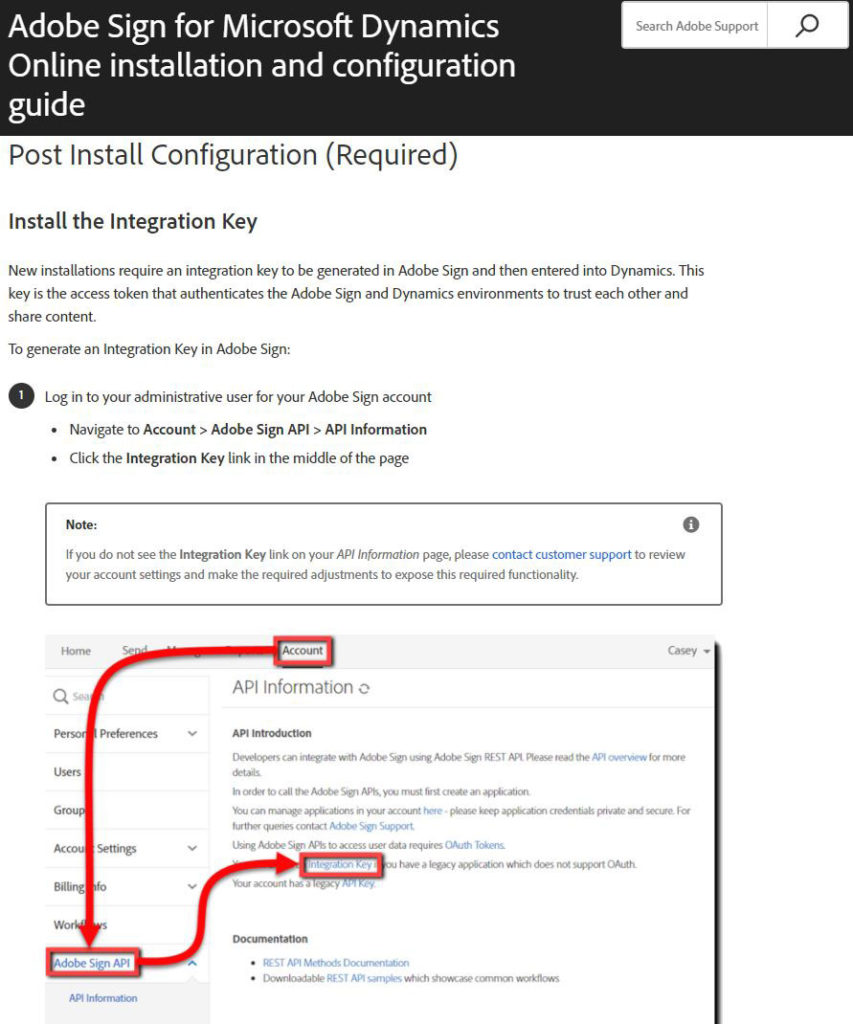
Following the guide instructions
In the following GIF, I am showing how I managed to generate the integration key from the Adobe Sign API and copy it into Dynamics 365 to be able to authenticate Dynamics 365 to process documents through the Adobe Sign account.
Complete the Adobe Sign setup
As instructed in the Microsoft Dynamics 365 installation guide, we are required to disable legacy form rendering and enable activity feeds on the new generated Adobe Agreement table.
Disable legacy form rendering
From the classical system settings under administration and from the General tab, set the “Use legacy form rendering to “No”. By default, the value is set to “No”, however validating that it set to “No” is essential to ensure the success of the integration.

Enabling Activity Feeds on Adobe Activity table
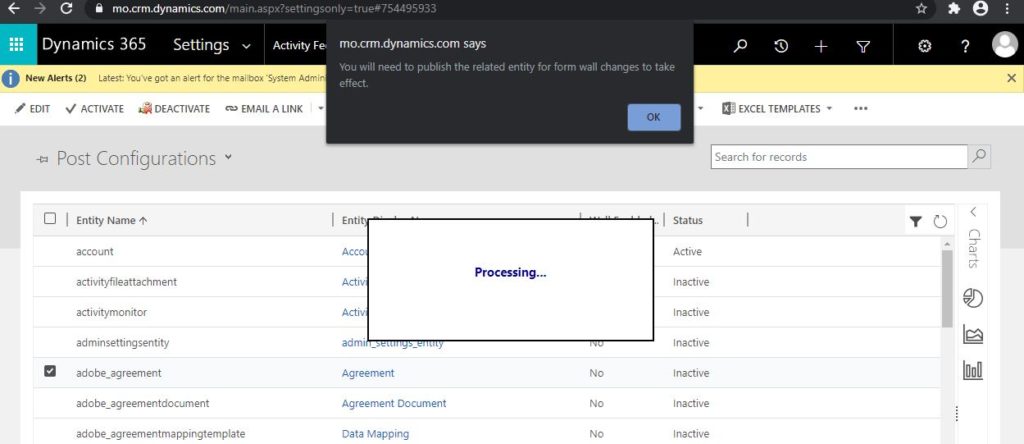
1. From the classical system settings under Activity Feeds Configuration, as shown below.
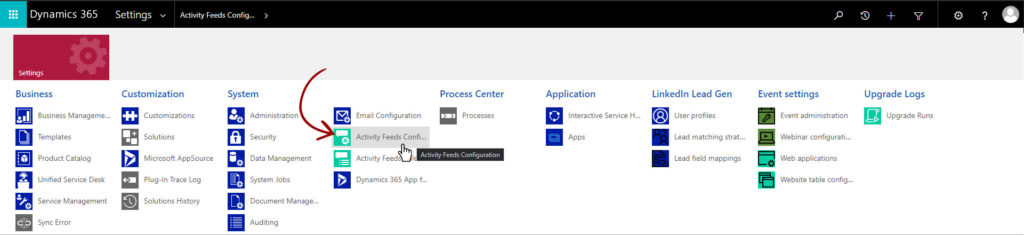
2. Change the Activity Feeds Configuration view to “Post Configuration”
3. Click the refresh button.
4. The new created table “adobe_agreement” will appear.
5. select the “adobe_agreement” and click activate.
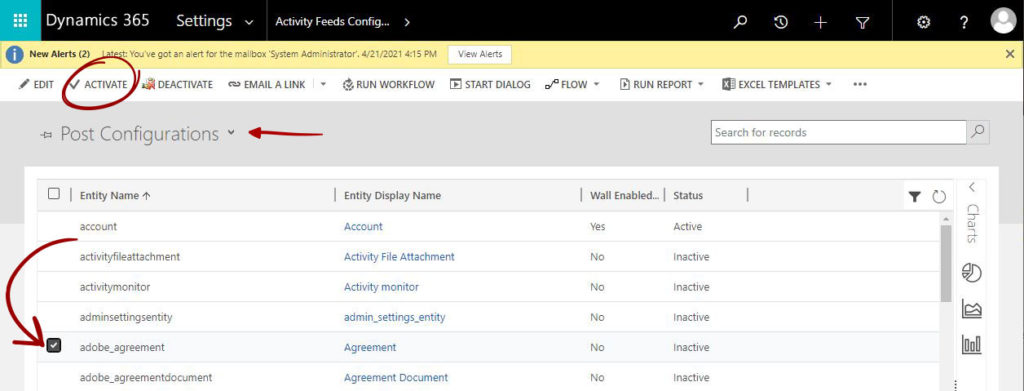
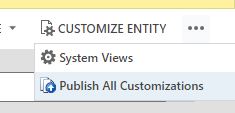
6. A notification will popup instructing to publish the changes applied. Finally, Publish all customizations from the same screen.
Enable real-time agreement statuses update
This step is very important to get a quick update on Dynamics 365 agreements statuses. If we dont perform this action, the integration will work, but the agreement statuses will not be updated immediately after the agreement is signed.
This is a long process and is explained well in the user guide to the Microsoft Dynamics 365 installation guide.
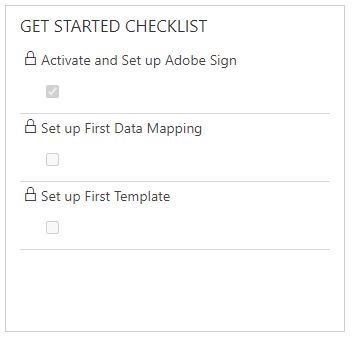
Finally, the get started checklist
Now that the installation is complete, and from the Adobe Sign app, we will see the get started checklist under the admin settings page.
- Activate and set up Adobe Sign (Checked)
- Set up the first Data Mapping (Unchecked yet until the first data map is created.)
- Set up the first Template (Unchecked yet until the first template is created.)
Start using and testing the Adobe Sign for Microsoft Dynamics 365 trial
Now we can start testing the Adobe Sign for Microsoft Dynamics 365 trial by creating data maps and templates to be used with standard or custom entities.
3 comments
excellent program
user friendly program
user friendly