


I have decided to write a series of articles to walk through creating an SLA. Explaining the methodology behind the SLA design, demonstrating how it works and what to with it and finally how to add actions. How to create Dynamics 365 Service Level Agreements is the first article of the series.
Background on how to create Dynamics 365 Service Level Agreement
I was first introduced to service level agreements when I started my first job after graduating school as a Technical Support representative, and I can tell you I was not a fan. Having a counter running on my cases for management to measure my performance kept me on edge. But later in my career, I became a BI developer and learned how important they are in measuring someone’s performance and measuring the performance of the processes. I recently explained this to a client that had concerns in implementing service level agreements for their team. I had them look at it as KPI to help identify both training opportunities and process changes.
In the past, I had complaints about the limitations that the Dynamics 365 function had, but recently, I had the opportunity to see the recent updates, and I can say I am a fan. It almost feels that the Microsoft gods were listening to every fowl word I had screamed out.
To understand about me, when I learn something, I try to figure out a very complex example and then try to implement it. I searched online and found that the documentation is very high level, and I could not use it to implement my idea. So, I kept searching, and with trial and error, I achieved my goal.
Key Components
Let us review some of the key components that make up the Service Level Agreements in Dynamics 365 Customer Service:
- Service Level Agreement – These are the core records, and it is where everything comes together.
- SLA Items – These can be thought of as the timers I mentioned earlier. Each of these has a starting point and endpoint. They have the time thresholds for warnings and failures.
- SLA KPIs – These records are like templates used in the SLA Items. This is where you can establish the starting point. The KPI Field is a lookup field that is populated with the SLA Item. I will explain this further when we review the SLA in action.
- Actions – Actions is where you can set up the action to occur when any of the thresholds are hit or when the SLA was a success.
Let us Begin
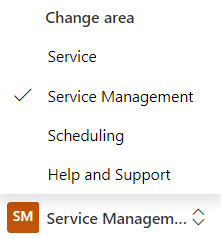
It begins our journey explaining how to create Dynamics 365 Service Level Agreements with the Service Level Agreement record so let us create one. Open the Customer Service Hub application. At the bottom of the navigation bar on the left, you will most likely see service. Click on it and change it to Service Management.
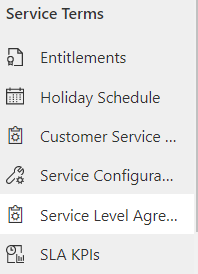
In the left navigation bar press the Service Level Agreement button under the Service Terms section.
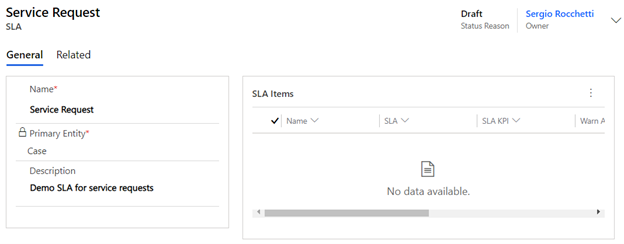
Now press the + New button to create a new record, as shown below.
Now enter a name for the SLA and select the entity the SLA is for. In this example, we will set this to the Case entity. Provide a description if you want and then go ahead and press the Save button.
SLA Item
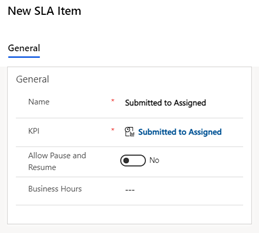
Next, we need to begin adding the SLA Items. These are the timers, and for this example, we will be creating four. I will take you through creating the first one and then provide screen captures for the other three we need. From the SLA Screen, click on the ellipse on the top right corner of the SLA Items sub-grid and then select + New SLA Item.

In the general section entering a name and select a KPI. These are the KPI SLA’s we created earlier.
Turn off All Pause and Resume and leave Business Hours blank.
Pausing of KPI’s can be simple by allowing the user to manually pause and resume or complex by having the system pause the SLA when a condition is met and then continued when another condition is met. I will try to cover this in detail in another tutorial.
Business hours can be set up in another area of the system and then added to SLA Item. I am sure that you can guess that this applies your business hours to the timer. So, if a case is created 1 minute before the end of the business day, then only one minute will pass, and then the timer will resume the next business day. Again, there are great resources online on how to set up business hours, so we will not cover this today.
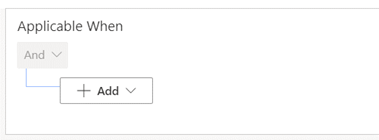
Applicable When
The “Applicable When” section can be left blank, as the SLA KPI provides this to the SLA Item.
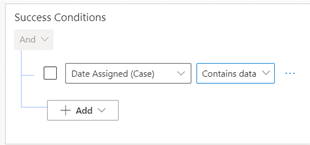
Success Conditions
The success condition is when the timer on the item will stop. In this example, the timer will stop once the Date Assigned field is populated.
Warn and Fail Duration
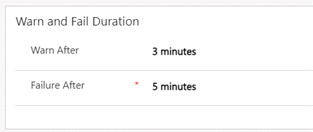
Set the Warn After to 3 minutes and the Failure after to 5 mins. These are the duration thresholds I mentioned earlier. You may find that the drop-down has set values when you set these, but you can change the number value after selecting an option. I chose 5 minutes for the warning in this example and then changed the 5 to a 3. Press Save. This will make Configure Actions button appear in the Actions section.

I will cover the creating of the actions in the next section.
Now let’s see what the last three look like
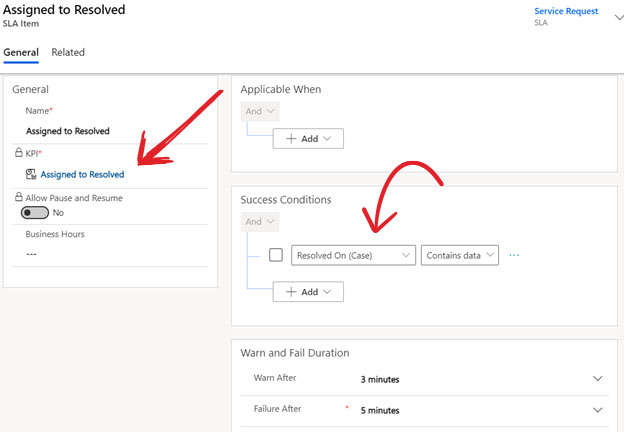
Assigned to resolved
Assigned to resolved SLA Item added with the KPI set to “Assigned to resolved”
Success Condition is set to Reseolved on (Case) variable containing data.
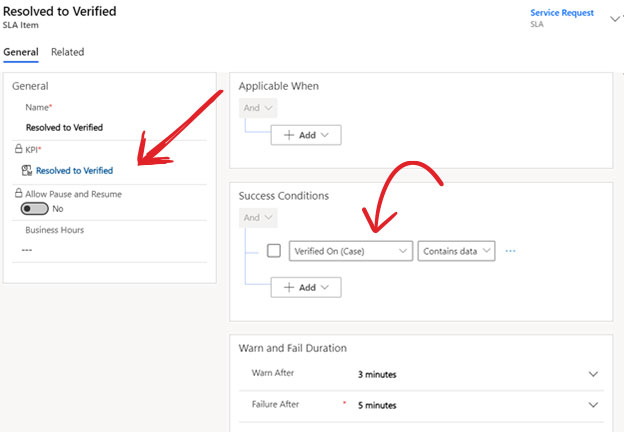
Resolved to Verified
Resolved to Verified SLA Item added with the KPI set to “Resolved to Verified”
Success Condition is set to Verified On (Case) variable containing data.
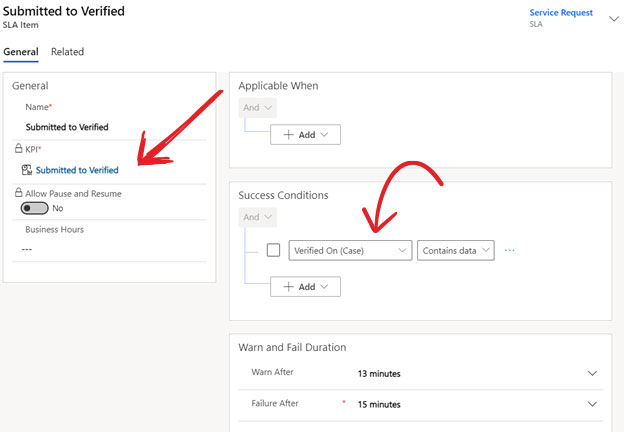
Submitted to Verified
Submitted to Verified SLA Item added with the KPI set to “Submitted to Verified”
Success Condition is set to Verified On (Case) variable containing data.
The final piece is the actions, but we do not need any actions to get the SLA working for the purpose of this tutorial. To learn more about action, please read more about “Dynamics 365 Service Level Agreements Actions” in my future article.
Now What?
So now we have our first SLA, but how do we see it in action. First, we will need to add a timer window to the Case form. To do this, you will need to open the form in the customizer to add a sub-grid to the form. On how to get the form open in the customizer, please check this link here.
This is what it should look like.
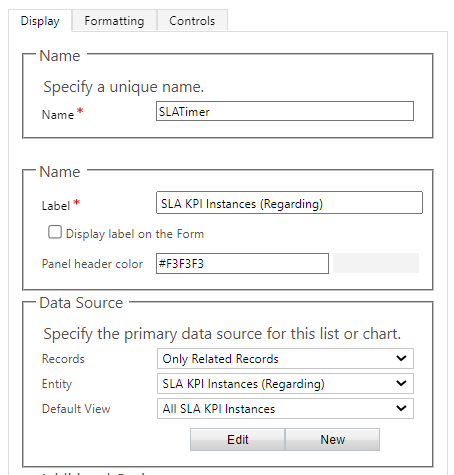
Next, click on the Controls tab so we can add the visual timers instead of just some rows. Click on Add Control and look for SLA Timer. Now change three radio buttons for this new control, and you can change the Update Frequency.
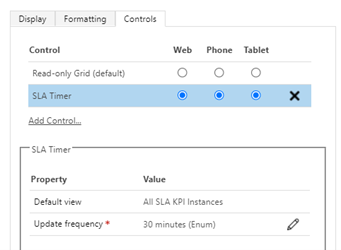
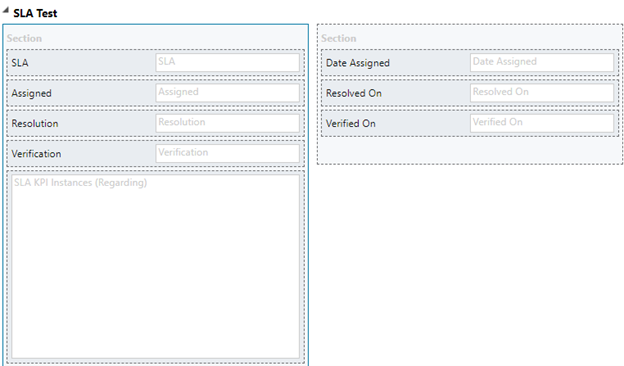
Click OK, save the form, and do not forget to publish it. You will also want to make sure that the SLA field is on the form. I created a new section on the form and added all the fields used for SLA to verify that everything is working in order.
That is it on How to create Dynamics 365 Service Level Agreement. We now have our first SLA built into the system. In my next article, I review the SLA in action with examples of how it all adds up. Check out Dynamics 365 Service Level Agreements Methodology.